xmCloud development on Ubuntu using Github Codespaces
In this article, I show you step-by-step how to use GitHub codespaces (Visual Studio code online) from anywhere.
Main credits go to Richard Seal and the Sitecore team, nicely done: https://developers.sitecore.com/learn/accelerate/xm-cloud/pre-development/developer-experience/dev-workflow-codespaces
Setting up your code
In your repository root create a folder named .devcontainer and inside of it create a configuration file called devcontainer.json.
Using this file you will instruct the code space to configure your instance, we are using dotnet template for this:
{
  "name": "Add Your Desired Codespace Name Here",
  "image": "mcr.microsoft.com/devcontainers/dotnet:1-6.0",
  "features": {
    "ghcr.io/devcontainers/features/node:1": {
      "nodeGypDependencies": true,
      "version": "lts",
      "nvmVersion": "latest"
    }
  },
  "forwardPorts": [3000],
  "portsAttributes": {
    "3000": {
      "visibility": "public"
    }
  }
}
To be able to get the preview and external access we need to configure the port-forwarding for port 3000.
Commit and push your changes to your repository.
Setting up Codespace (VS Code Online)
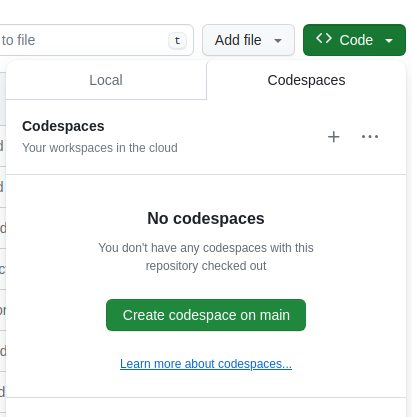
setting up the codespace is quite easy, you can do it on your repository or by going to https://github.com/codespaces.
The pricing for the codespace depends on the number of CPU cores / RAM that you choose:
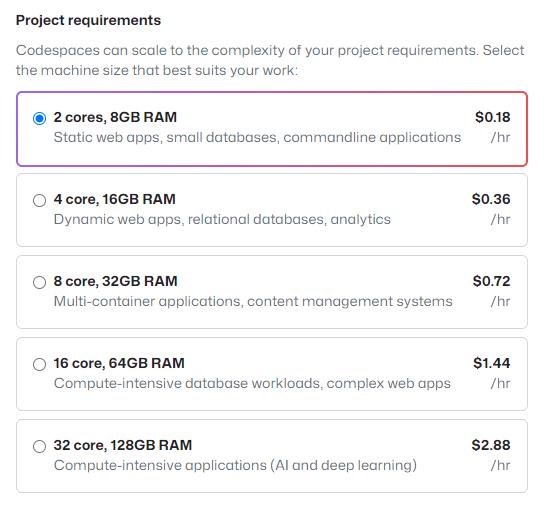
You can configure the timeout for codespace under your account, after the configured amount of inactivity the codespace will be stopped and you will not be charged for it, it will save you some money.
After clicking on the create codespace from the code dropdown on GitHub, it will take a minute or two for your codespace to be ready.
When it is ready, an instance of the VS code will be shown in the browser with your code. Navigate to the src/sxastarter and run npm install .
Open the .env file, here you need to configure the environment that you need to connect to, which either will be XmCloud or Experience Edge.
Depending on the environment you need to configure the following variables:
- JSS_EDITING_SECRET: find it on your xmcloud by calling showconfig.aspx
- SITECORE_API_KEY: either Sitecore API key or edge token
- SITECORE_API_HOST: either xmcloud URL or edge URL
- GRAPH_QL_ENDPOINT: either xmcloud or edge graphql endpoint
- PUBLIC_URL: public URL of your codespace.
The correct way of handling the environment variables is by using the nextjs conventions, by creating .env.local file:
https://nextjs.org/docs/basic-features/environment-variables
The easiest way to get the public URL is by using the ports tab in vs code:
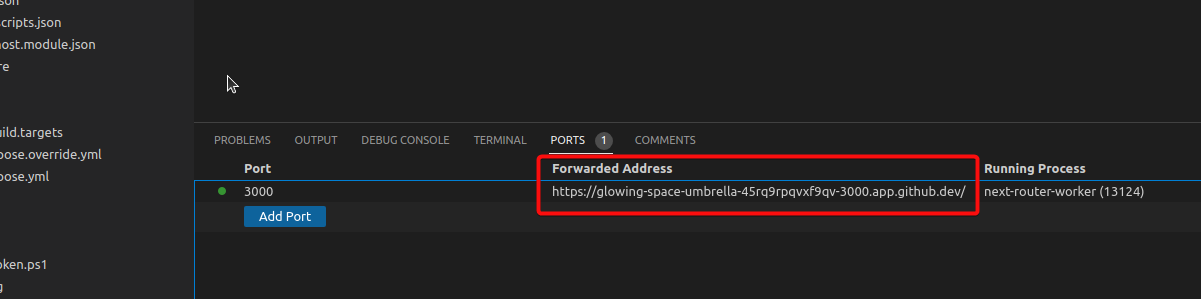
You can copy it from there. When you are done with .env file, then you can run npm run start:connected
When the server is ready, you will see a popup in the right corner, or you can just click on the browser icon from the ports tab and you should be able to see your website.
Configure Sitecore Pages
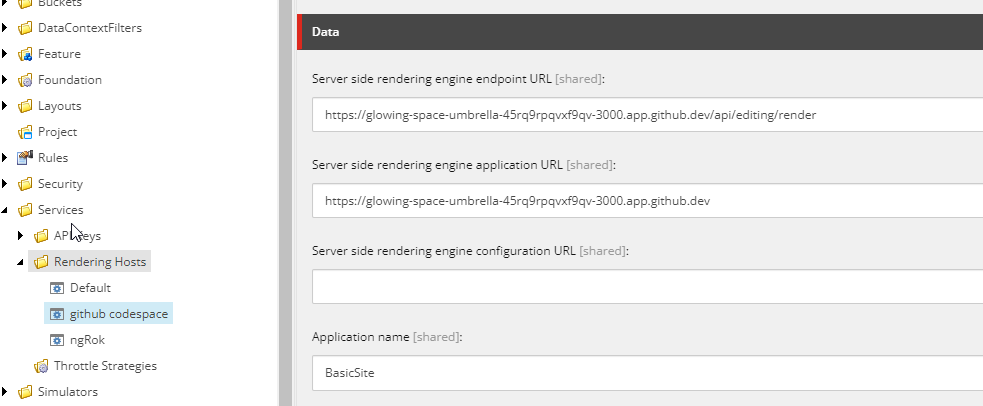
To connect the Sitecore Pages to your codespace, you need to define a rendering host under /sitecore/system/Settings/Services/Rendering Hosts. Right-click on it and choose Insert>Rendering host and Name it Github codespace.
You need to configure the following fields:
- Server side rendering engine endpoint URL - enter your codespaces application URL (Copy the forwarded address for port 3000), followed by the path: /api/editing/render.
- Server side rendering engine application URL - enter your codespaces application URL.
- Application name - set to your JSS application name.
The result should look like this:
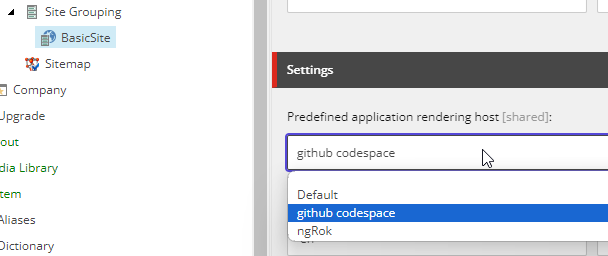
Now go to your Site Definition und <site root>/Settings/Site Grouping. In the Predefined application rendering host choose the rendering host that you defined in the previous step. To prevent the site resolving issues, set the Hostname field to the github domain of your codespace:

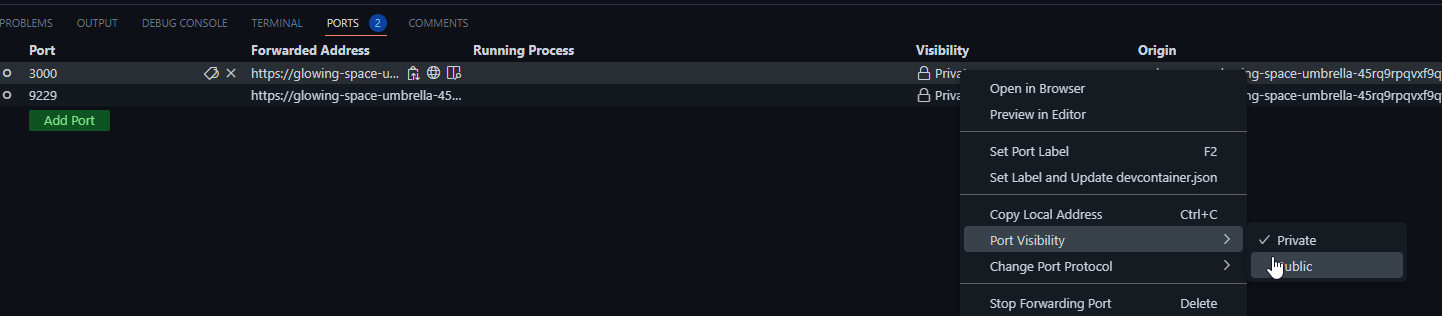
Now if you open the Sitecore pages you will get an authorization error. The reason is that port 3000 is set to private. In the VS code on the ports tab right click on the port 3000 URL and set the visibility to public.
and that's it, now if you refresh the Sitecore Pages, it will render the results from your codespace environment.
Final Words
It is amazing to see how easy and quickly you can get up and running your development environment without any hassle. I must say even the smallest machine on the GitHub code space has an acceptable performance and it is quite cheap. This is especially a good solution for frontend developers who want to focus on the next js app development and usually use Mac and can not run Windows containers.
I suggest to check the pricing for the GitHub codespace:
https://github.com/pricing/calculator
https://docs.github.com/en/billing/managing-billing-for-github-codespaces