Extending Security Roles in xmCloud
This article shows you how to extend the Sitecore security roles using the Setup security script.
Setting up the Security Roles using Script
Out of the box, you can quickly set up the security roles using the Powershell script.
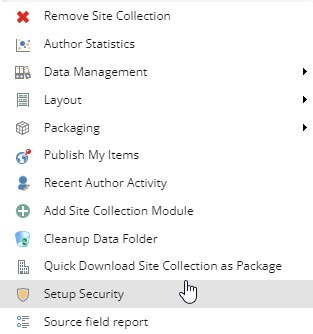
To do that first, you need to right-click on your tenant(Headless site collection) and select the Setup Security from the scripts menu:
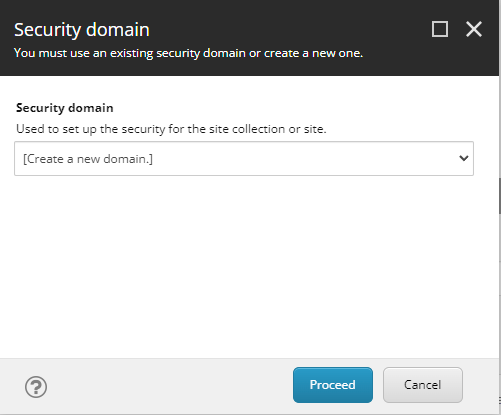
It will show you a dialog where you can create a new domain(if leave it empty) or use an existing domain:
After choosing/creating the domain, it will show you a role assignment dialog:
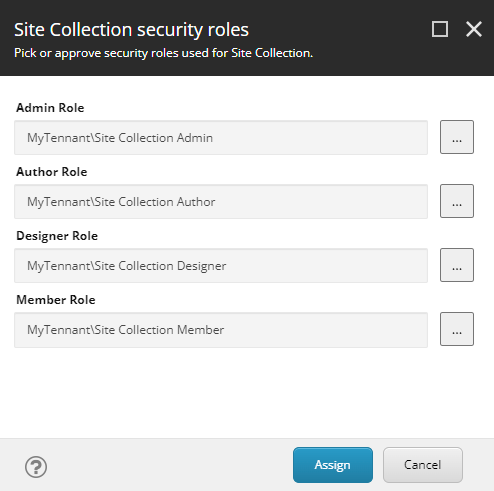
Theoretically you can change the assignment, after clicking the assign, the roles will be assigned to your tenant.
The next step is to assign the roles to the site, again the same process, you need to right-click on your site and from the Scripts menu choose the Setup Security.
Extending the Security roles scaffolding
It is possible to create a new role and use it in the scaffolding process. The security setup configuration can be found under: /sitecore/system/Settings/Foundation/Experience Accelerator/Security.
Here I will give you an example of how to add a new Site Role that can be used by Setup Security script.
Under the /sitecore/system/Settings/Foundation/Experience Accelerator/Security/Security Setup/Enums/Role Types add a new Enum:
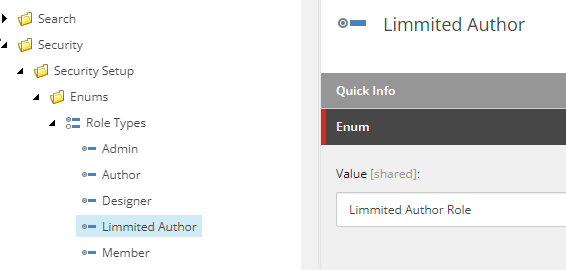
The value will be used to create a Sitecore Role.
Under the Site folder create a new Role placeholder item:
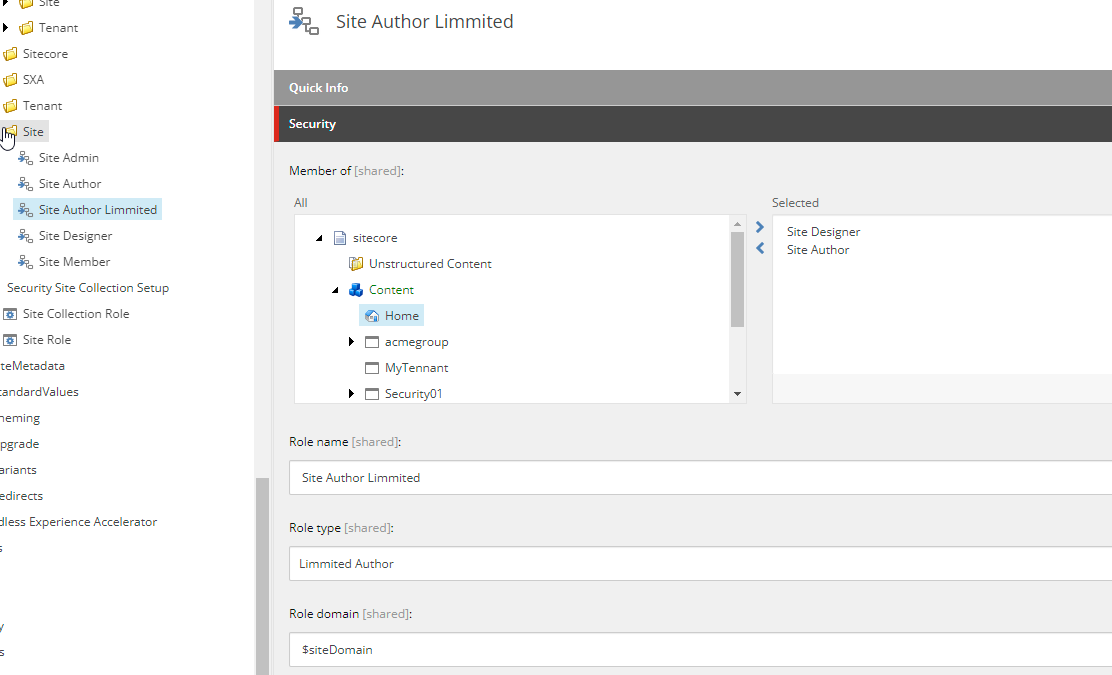
For the Role type, select the role type you have created in the last step. You can control the inheritance using the Member of field.
Assigning the security to the scaffolding is a bit tricky because you can not choose the Role from the security dialog.
As an example, click on /sitecore/system/Settings/Foundation/Experience Accelerator/Security/Security Setup/Mappings/Site/Headless Site root/Home and make sure the Raw values and Standard fields are selected. In the Raw value of the Security field add your Role:ar|$siteDomain\Limmited Author Role|pd|+item:read|
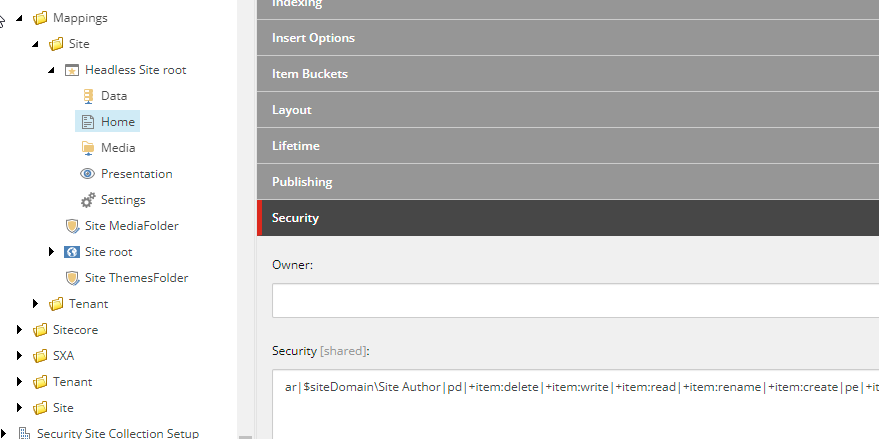
It should look like something like this:ar|$siteDomain\Site Author|pd|+item:delete|+item:write|+item:read|+item:rename|+item:create|pe|+item:write|+item:read|+item:create|ar|$siteDomain\Limmited Author Role|pd|+item:read|
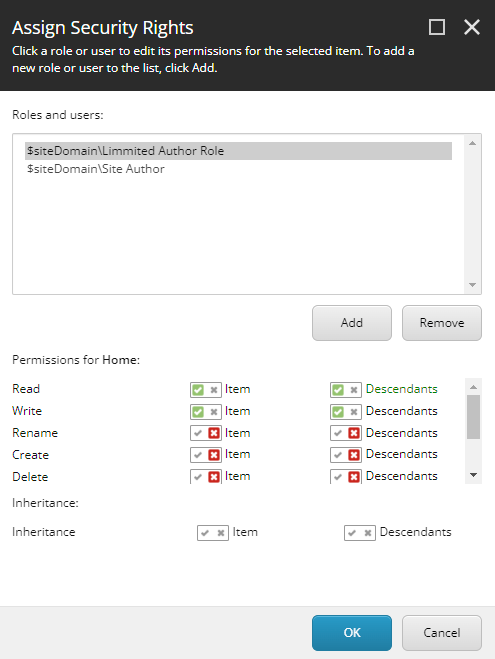
Now uncheck the Raw Values and from the Security ribbon click on assign:
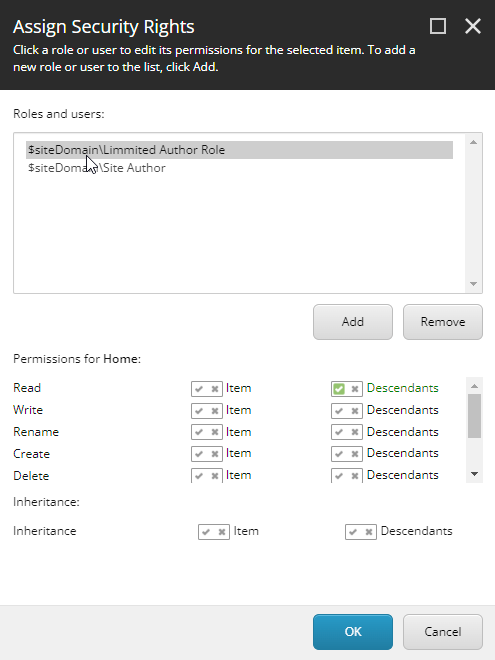
You are able to see your Role and you can assign the permissions to it.
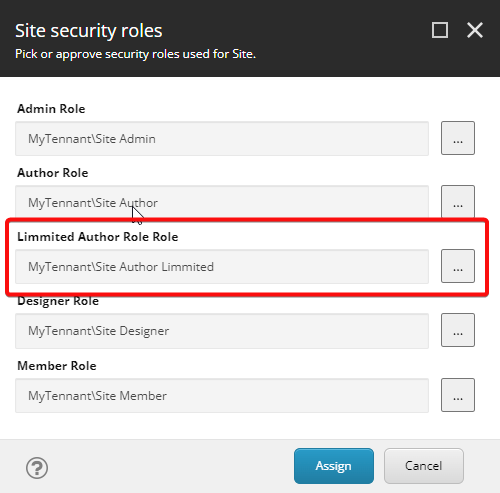
Now when you use the Setup Security script you will see your Role in the dialog:
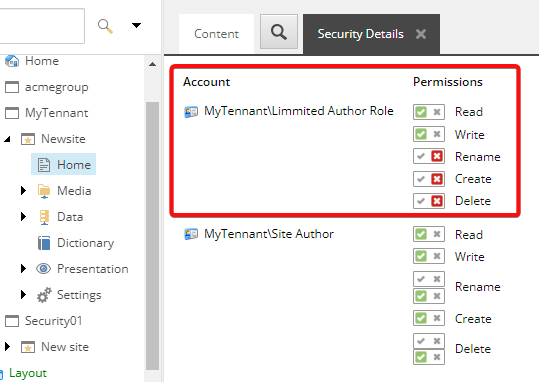
And after running the script you can check the security details of the Home item:
The Security configuration is quite flexible and you can configure roles for the site or tenant. Here I just gave you a starting point, so depending on your requirements, you can configure the setup security script.
,